I know that SCCM 2012 can install the Endpoint Protection if defined in policy, but sometimes it is better to be in full control, and have protection up and running with the latest definitions as soon as your OS has been deployed.
The process
To deploy the Endpoint Protection Client as part of our OSD Task Sequence, the following steps needs to be performed:
- Configure SCCM Client settings so EP clients are managed once installed
- Create and export a default EP policy
- Create package to install EP client with a default policy in Task Sequence
- Create source location for EP definitions to install during Task Sequence
- Create package with latest EP definitions
- Modify Task Sequence to install Endpoint Protection
- Sit back and relax, knowing your newly deployed computers are fully protected
Configuring SCCM Client Settings
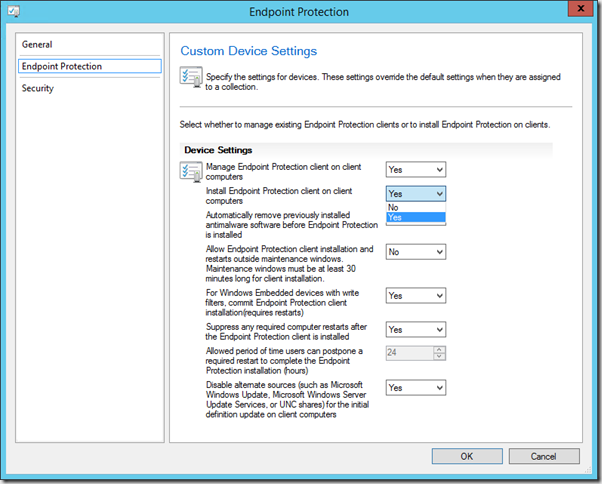
To be able to manage your EP clients from SCCM once they are deployed, you need to configure SCCM Client Settings for Endpoint Protection and deploy them to collections containing your computers.
You can define the EP settings as either just manage existing clients, or to install the EP client. If install EP client is selected the client installed by the Task Sequence will not be reinstalled, just managed.
Create and Export EP Policy
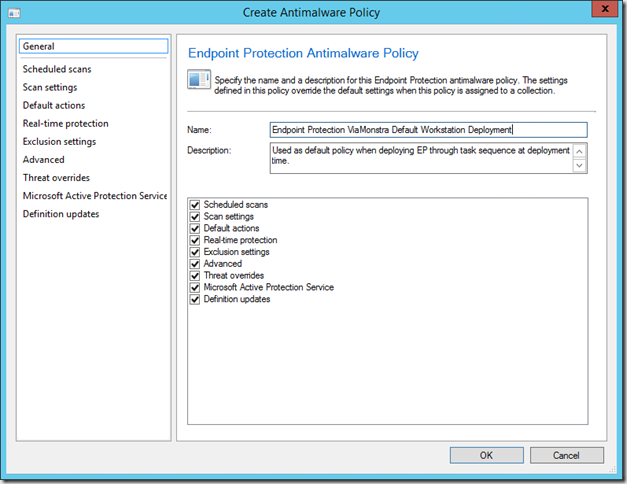
During installation we will supply a default Endpoint Protection policy so EP knows how to behave when first installed.
From your ConfigMgr console, expand Asset and Compliance, Overview, Endpoint Protection, Antimalware Policies and click import on the ribbon. Browse to the following location:
<ConfigMgr installation path>\AdminConsole\XmlStorage\EPTemplates and locate and import the SCEP12_High_Security.xml template (or use any other template that you prefer).
Now we can modify the policy to our hearts content, giving it a more saying name, setting default scan schedules, adding exclusions etc. Click OK when done.
Now export the new policy by selecting it and clicking export on the ribbon. Save the file as ep_defaultpolicy.xml (or use any name that you prefer, I just replace the default file in the installation source to make it easier).
Create EP Client Package
To install the Endpoint Protection client in the task sequence, we need to create a package with the installer and the default policy we just exported.
Create a source folder for the package content in you usual location, and copy the following files from <ConfigMgr install dir>\Client folder and the path of your newly saved policy to your new content folder.
- scepinstall.exe
- ep_defaultpolicy.xml
Create a new textfile named Install.cmd and edit it.
Enter the following line to install the EP client and make it use the supplied policy. Save and close the file. (make sure file extension is .cmd not .txt).
scepinstall.exe /s /q /NoSigsUpdateAtInitialExp /policy %~dp0ep_defaultpolicy.xml
If you are wondering what the parameters is for, here is a short description:
- /s – Install silently (guess you already guessed that)
- /q – Extract the setup files silently
- /NoSigsUpdateAtInitialExp – Suppresses the initial download of definition files from external sources. We will supply the most recent definitions in the task sequence just after installing. so no need to download.
- /policy – Specifies which policy xml file to use. This parameter requires a fully defined path to the xml file, so we use a CMD file and the %~dp0 argument to locate the current path relative to our package at deployment time.
Edit the ep_defaultpolicy.xml with a text editor of your choice.
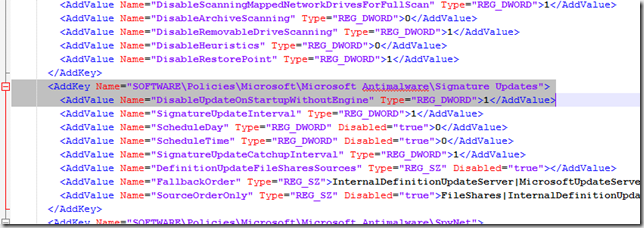
Insert the following line in the “Antimalware\Signature Updates” policy and save the file. (please note that xml is case-sensitive).
<AddValue Name="DisableUpdateOnStartupWithoutEngine" Type="REG_DWORD">1</AddValue>
Your package source should now look like this:
Now create a package for the installation.
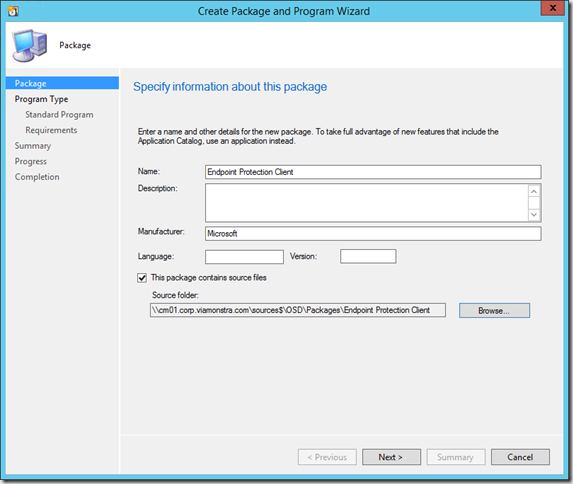
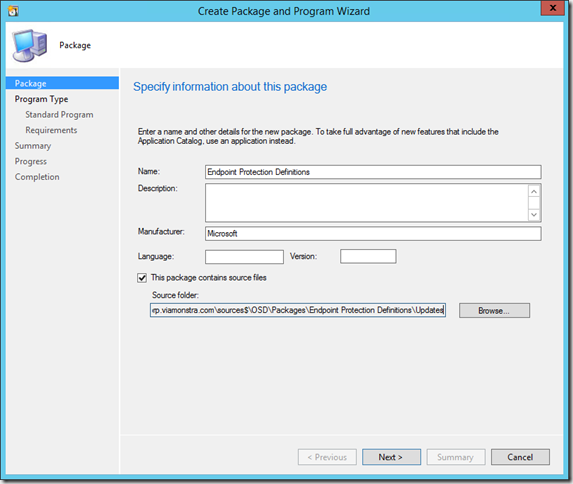
Name the package and specify the source folder just created
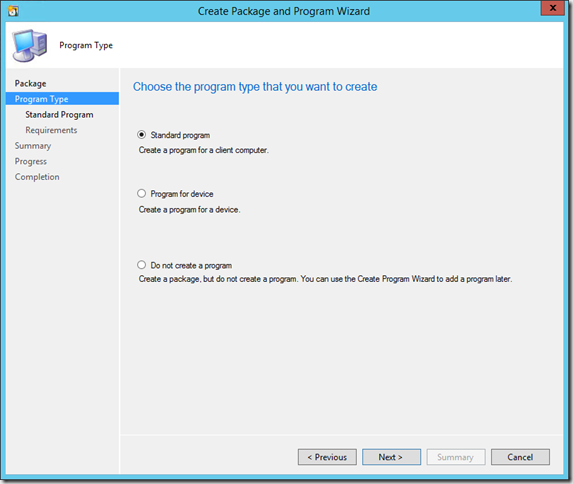
Select Standard program
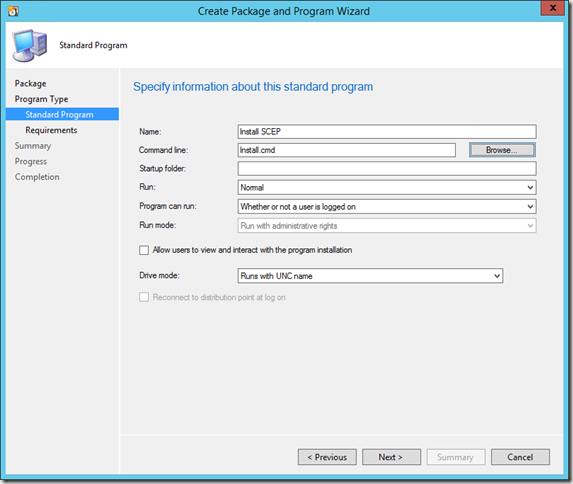
Name the program and select Install.cmd for the command line. Make sure the program is set to run Whether or not a user is logged on.
Finish the wizard and distribute the package to your deployment points.
Downloading EP definitions
Next we need to download the latest EP definitions to install in our task sequence.
First lets define a location for the downloaded files. In our package source folder next to the folder for the EP client package, we create a folder named “Endpoint Protection Definitions”. In this folder we create the following subdirs:
\Updates
\x86
\x64
To ensure newly installed computers have the latest files available, we need to download the definitions on a regular basis. Lucky for us someone has already created a script that can be scheduled to download the files to our new location. Source: TechNet Forum Article
The script can be downloaded here:
We need to edit the script to tell it to download the files to our new folder.
Edit the script file and change the “str_______location” variables (4 lines needs to be changed):
Place the script in the root of your new “Endpoint Protection Definitions” folder.
Execute the script (double-click) to download the newest definitions.
Your x86 and x64 folders should now contain the following files:
You can now schedule the script through Windows Task Scheduler to be executed at an interval of your choice. Once a day is what I use.
Create EP Definitions Package
Now we need to create a new package to install our downloaded definitions.
Name the package and specify the source folder we just created, Use the Updates subfolder as the source.
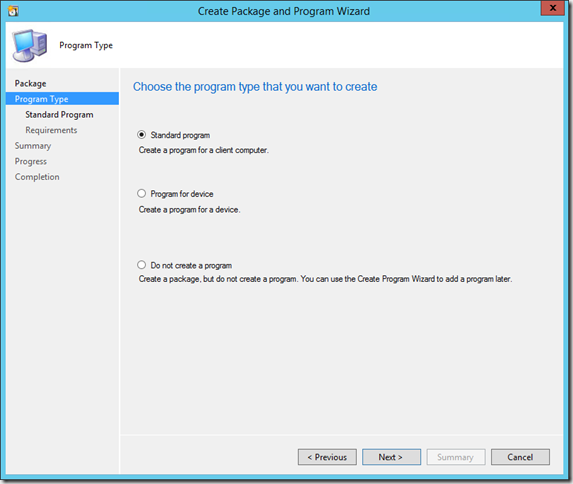
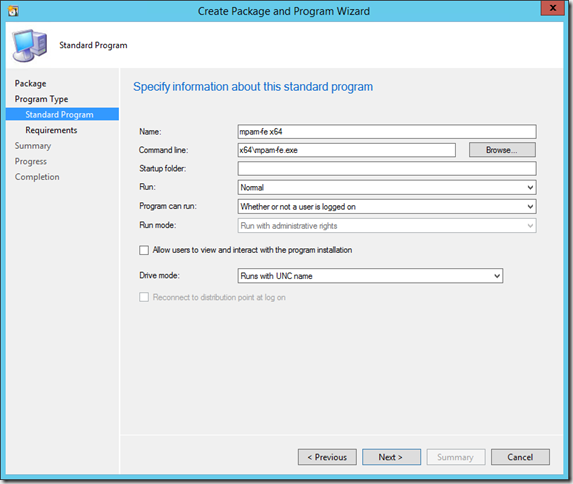
Select standard program for the first of 4 definition installers.
Name the Program and select the first definition update, in this case the mpam-fe.exe from the x64 sub-folder. Make sure the program is set to run Whether or not a user is logged on.
Finish the wizard and add programs for the remaining 3 files as shown here.
Distribute the package to your distribution points, and change the properties of the package to distribute the content on a schedule set accordingly to your script schedule.
Modify Task Sequence
Now lets look at the Task Sequence
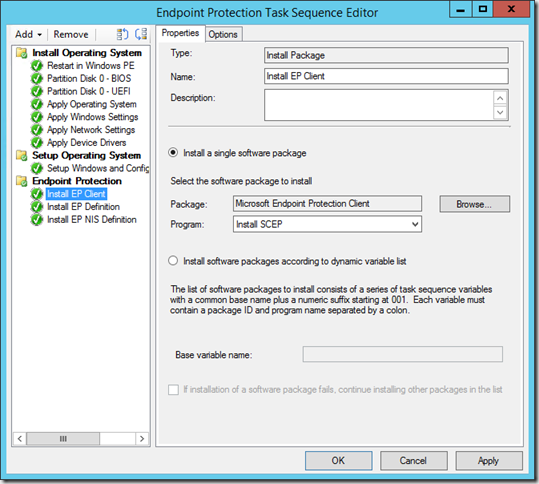
Just after the Setup Windows and Configuration Manager step add a new group named Endpoint Protection. In this group add an Install Package step as shown below
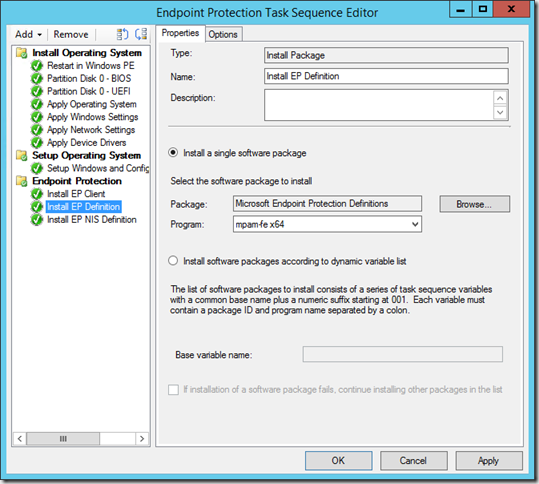
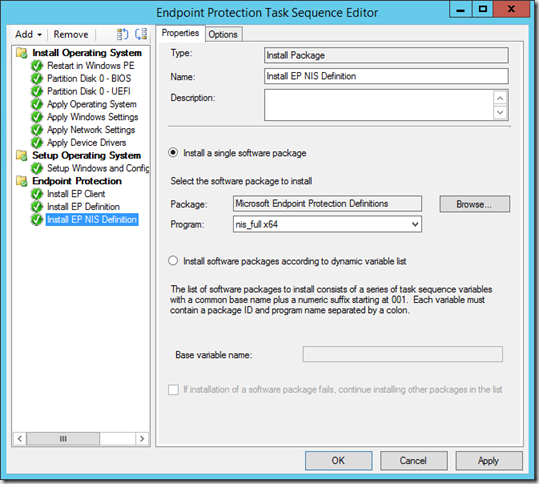
Next add two install package steps to install the definition files that matches the platform of the OS being deployed.
Time for Coffee!
Now sit down and relax, have a cup of java and rest assured that newly deployed computers are protected by Endpoint Protection as soon as they are deployed.






I continue to get a 0x8004FF6C error. The policy file “xxxxxx” was not found or could not be validated.
Please help.
Where can I download the lastest SCEPinstall.exe (4.8)? I only have an old one.
If this thread is still alive.
When my update steps run in the sequence they fail with multiple reasons, which I get for both 32bit and 64bit sequences for multiple OSs 7 and 8 mostly. I have had the error of mpam-fe.exe / nis_full.exe is not a valid Win32 application. I’ve also gotten “catastrophic failure” and “unspecified error”. The only thing I haven’t gotten is a successful update. My package and program are setup step by step from this page, obviously I changed all the appropriate information to my environment.
Also, there is also the mpam-d.exe, which I don’t have in the sequence. Should I be attempting to deploy that one as well, if so what order?
Does this still work for Windows 10? SCCM manages Windows Defender for Windows 10 instead of installing SCEP…
Great article!
But as others also wonder, can we import the endpoint protection policy to Windows Defender in Windows 10 during task sequence deployment?
Found a solution for Windows Defender policies in Windows 10:
“c:Program FilesWindows DefenderConfigSecurityPolicy.exe” EP_Policy.xml
This work like a charm. Thank you!
How do you just applye the Windows Defender policies as we are using Windows 10
How can you apply the Polcies on Windows 10 on the TS