I just love Windows 7 RC… It runs much better than VISTA, and has lots of super nice features. (Get it here http://www.microsoft.com/windows/windows-7/ )
One of these features is the ability to boot from a VHD, which actually means that I can run Win7 on my laptop, without having to reinstall my existing OS, mess around with partitioning or having to install some boot manager in order to run it a dual boot environment.
So what does this mean exactly!! Well for me it means that I can still have my Vista installed PC where I know my Microsoft training material works for when I’m teaching, and where i can always find a working driver for my hardware. further more, i don’t have to worry about the Windows 7 installation once the final release is out, as i can just remove the VHD from my hard disk.
Her is a Step by Step guide on how to do it.
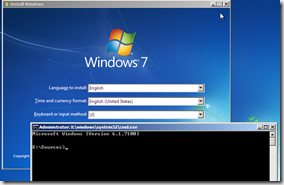 |
From your existing Vista /XP machine boot Your Windows 7 CD.
Once the Install Windows box appears, press SHIFT F10 to open a command prompt. |
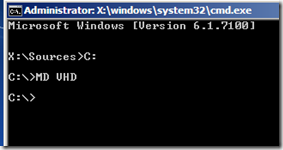 |
Crate a folder called VHD on your hard disk
NOTE: this folder you will contain the Win7 virtual disk, so make sure there is space enough. At least 15 GB. |
 |
You will now create the VHD to install Win7 on. This is done from DISKPART. Start diskpart by typing diskpart in the prompt. |
 |
type:
create vdisk file=C:\VHD\Win7.vhd type=fixed maximum=15000
Note: This will create a fixed size virtual disk. If you leave out type=fixed the VHD will be a dynamical expanding disk. |
 |
You must now select the newly created disk, and attach it to to system.
select vdisk file=C:\vhd\Win7.vhd
attach vdisk |
 |
Exit DISKPART by typing exit, and the close the prompt.
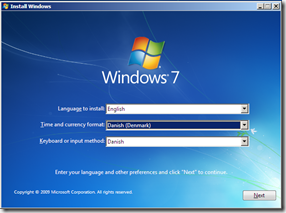
in the Install Windows box choose your language settings, and the click NEXT |
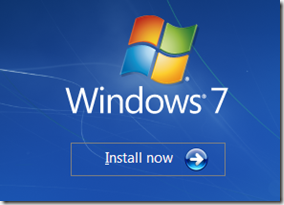 |
click Install now |
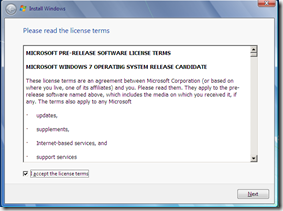 |
Accept the license terms, and click Next |
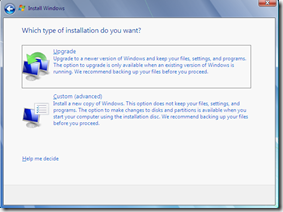 |
In the “which type of installation do you want?” box make sure to choose Custom. |
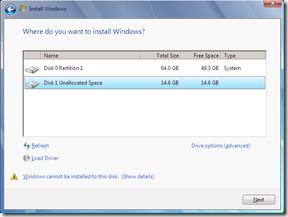 |
Choose the virtual disk you created, and click Next
Just ignore the warning saying that windows cannot be installed to the disk.

Note: It should be easy to identify by looking at the size, that should be almost the same size you choose when you created the VHD. |
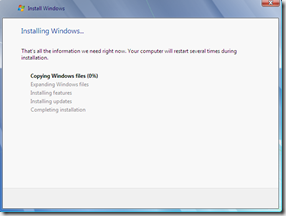 |
The installation will now run trough the normal setup process. and once finished, it will automatically create a dual boot setup, wit your old OS. |
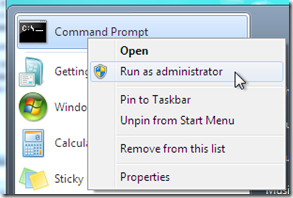 |
To change the Boot order start a Command prompt with elevated privileges.
Right click Command Prompt and click Run as administrator |
 |
type BCDedit /v to list entrees in the boot store.
NOTE: this must be done from the Win7 installation |
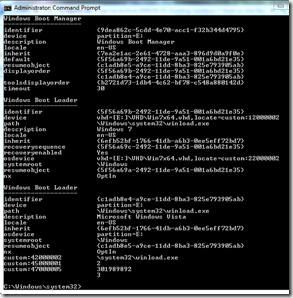 |
Change the description for your VHD installation to say. "Windows 7 VHD"
bcdedit /set {xxxxxxxx-xxxx-xxxx-xxxx-xxxxxxxxxxxx} description "Windows 7 VHD"
Replace xxxxx… the Win7 GUID
____________________________
Add VHD installation as the last choice in the boot list.
bcdedit /displayorder {xxxxxxxx-xxxx-xxxx-xxxx-xxxxxxxxxxxx} /addlast
If you have multiple entries, just type them in your preferred order separated by spaces, and drop the /addlast option.
|
That it.. Enjoy your new Win7 installation, i know you will love it..



raspberry weight loss supplement
Coretech Blog » Blog Archive » Try out Windows 7 without messing up your XP/VISTA installation