There is a new management agent in town…. the built-in Windows 10 management agent. With that agent you are able to deploy applications (with some limitations in TP3), gather inventory data and deploy configuration items. in this post I will describe how to you can create configuration items to control various settings. If you want to play around with the complete list of Windows Defender settings you can download the full list of CI’s here (I didn’t have time to test all of them……just saying).
The MDM requirements are a little tricky in the sense that you need the following site systems running in “PKI mode”:
- Device Management Point
- Device Distribution Point
- Enrollment Point
- Enrollment Proxy Point
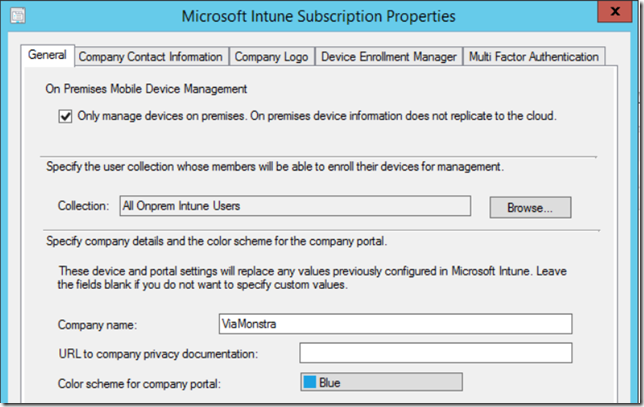
Besides the site system roles you also need to create a Microsoft Intune subscription (user sync to azure ad is not required). When configuring the subscription you’ll notice that the same connector now support both Cloud and On-premises MDM management. There will be a separate blog later explaining how to configure and install the on-premises MDM infrastructure. For now I’ll focus on testing a few features.
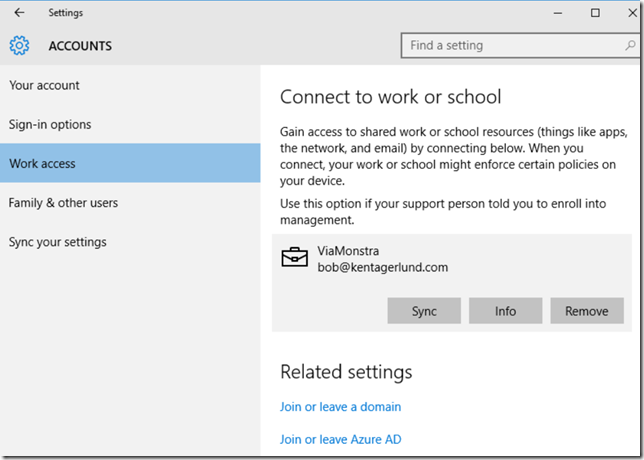
The enrollment process is straight forward, on the Windows 10 client open Settings, Accounts and configure the Work account. When enrolling the device you need to use one of the users defined in the collection you defined in the Intune connector.
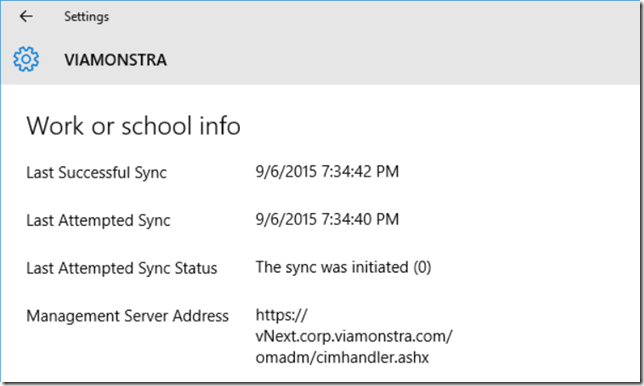
When clicking on the user information you’ll be able to see a few additional information and also initiate a synchronization. The synchronization seems to be controlled by the client agent refresh machine policy settings in the client agent settings.
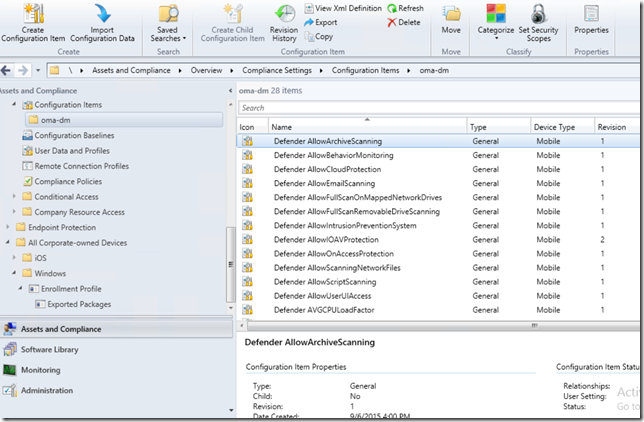
The Windows 10 Settings can be controlled thru the MDM agent using Configuration Items in Configuration Manager. In this example I have created a bunch of Windows Defender settings that control, how often the client will scan, when, what the end user can modify etc.
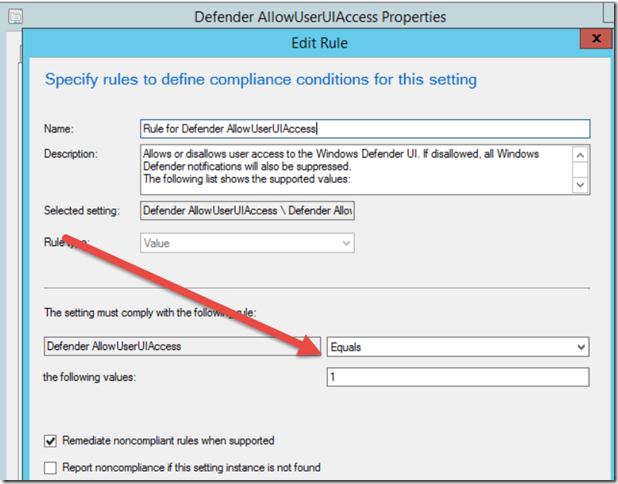
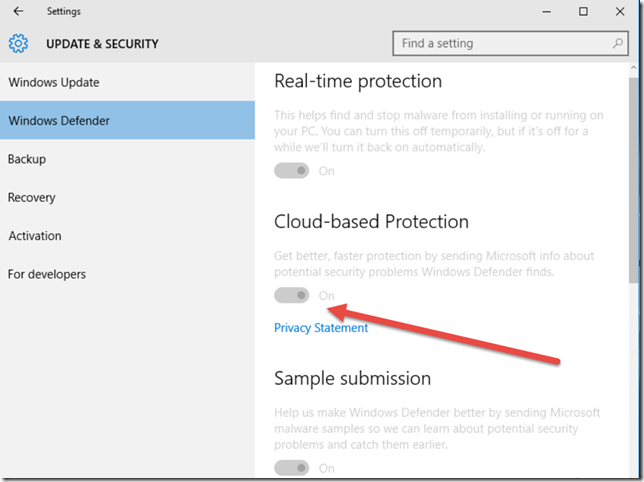
The result on the client looks like this in Settings, Defender. Notice that the client can see the current values but not change any of them. If you want to completely hide Defender from the user just use the configuration item Defender AllowUserUIaccess and configure the value to 0.
Creating the CI requires that you know a little about OMA-DM. There are several good blog posts explaining what that is all about. A good reference guide to what you can configure is this one https://msdn.microsoft.com/en-us/library/windows/hardware/dn904962(v=vs.85).aspx From the list of CSP’s select the Policy CSP and get started. The rules are simple, you follow the diagram below. The only thing you have to specify is the AreaName eg. Defender (to work with Windows Defender) and the Policy name eg. AllowUserUIaccess. In this example I’m configuring the Windows Update agent on the client ./Vendor/MSFT/Policy/Config/Update/AllowAutoUpdate – here “update” is the AreaName and AllowAutoUpdate is the policyname.

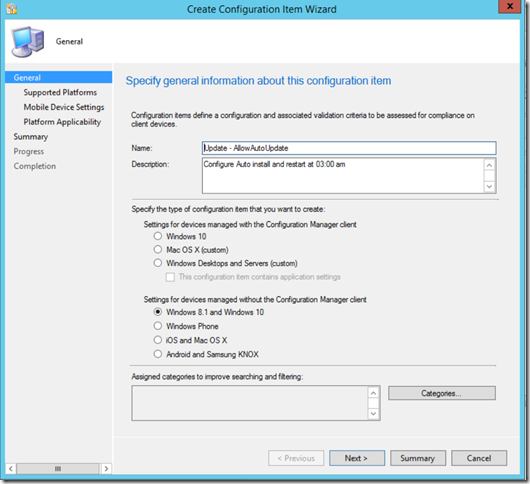
To configure the policy in Configuration Manager, open the Configuration Items in the Assets and Compliance workspace. In this example I’m configuring automatic update to download, install and automatically restart the computers 03:00 AM (the restart time is the default value and can be changed)
- Click Create Configuration Item, assign a name (remember a solid naming standard or you will regret it after a few weeks, using the AreaName and PolicyName works for me). Select Windows 8.1 and Windows 10, Settings for devices managed without the Configuration Manager client and click Next.
- On the Supported platform page, deselect Windows 8.1, Windows 8.0 and click Next.
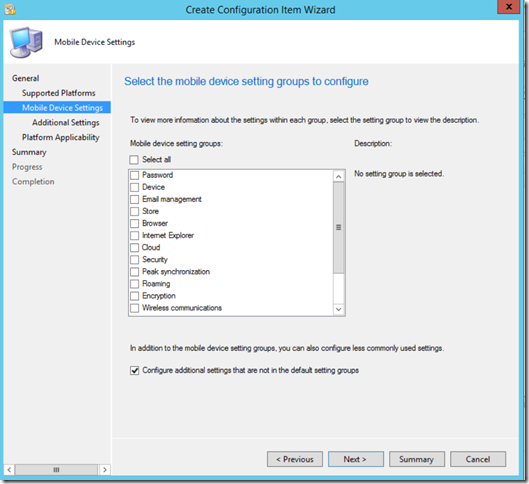
- On the Mobile Device Settings page, click Configure additional settings that are not in the default settings group and click Next.
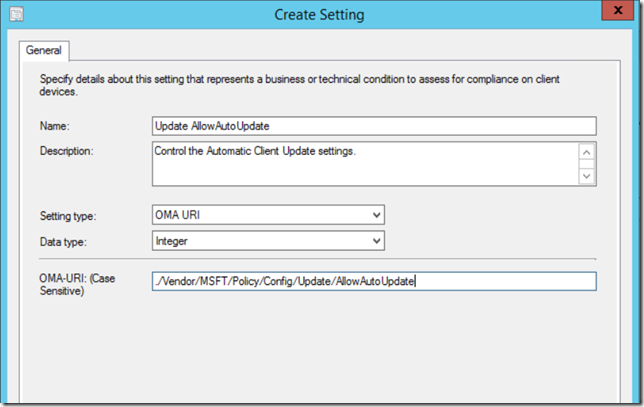
- On the Additional Settings page, click Add and Create Setting to start creating the custom CI. In Setting Type, select OMA URI, data type is Integer and the OMA-URI string is ./Vendor/MSFT/Policy/Config/Update/AllowAutoUpdate. Click OK when done.
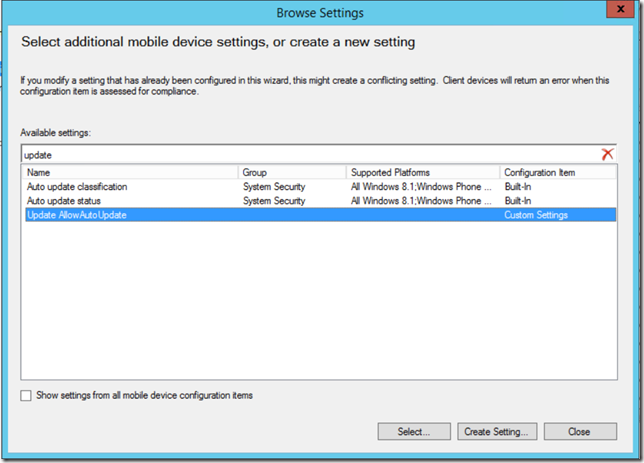
- From the list of configuration items, select the newly created item and click Select
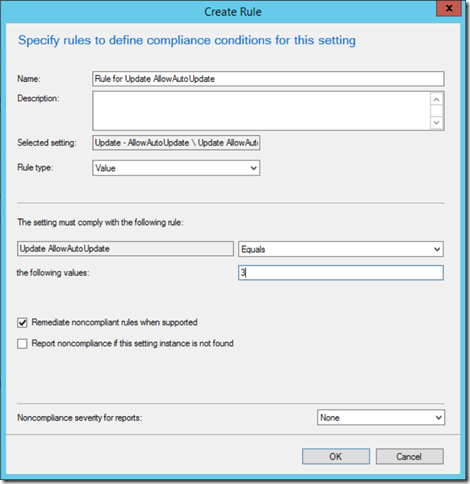
- In value type 3 and click OK.
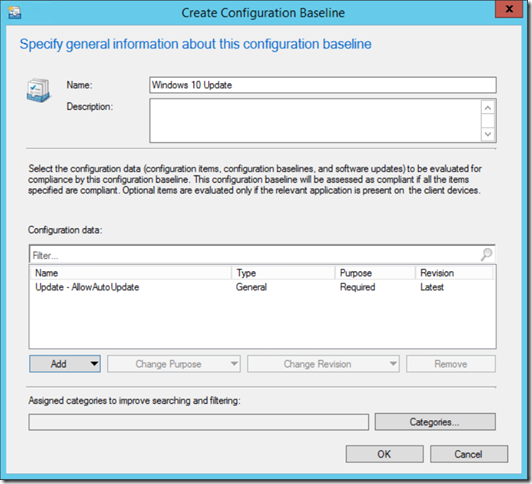
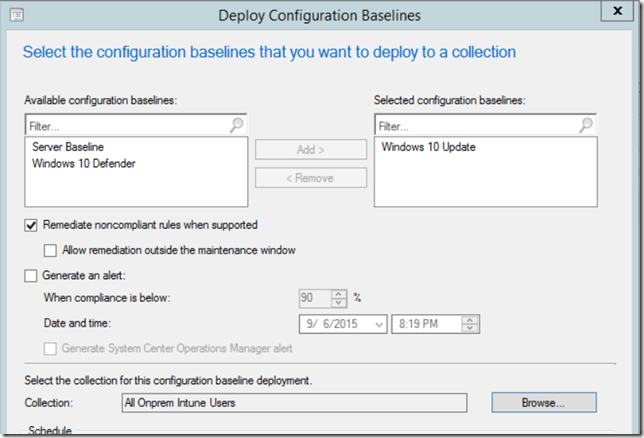
- Finish the wizard and deploy the Configuration Item as a baseline.
- In the deployment ensure that you configure Remediate noncompliant rules when supported
On the Windows 10 devices, the Advanced Update settings will automatically be changed after the next policy synchronization.
Inventory
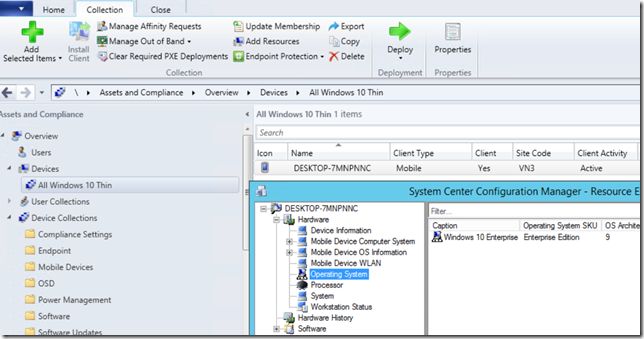
Unlike Intune enrollment this client will end up in the Configuration Manager console. Hardware inventory data is not as rich as the “real” Configuration Manager client – but you still get the most important stuff the OS version etc.
That’s it – happy testing and I’m sure you like me will find many scenarios where the Windows 10 MDM agent will be just perfect to meet the management needs.


Thanks for sharing this wonderful article Kent! Enterprise Mobility Management is not restricted to the management of mobile devices anymore and all thanks to MDM for Windows 10. There are Enterprises who deploy several Windows PCs or desktops and across varied locations. These Windows-based devices can be easily managed, controlled and secured with Mobile Device Management for Windows10.