As mentioned in my previous post (using the WMI feature of the tool) we have recently released a new tool – the Coretech WMI and PowerShell Explorer. For information about downloading and installing the tool checkout this blog post from Kaido Järvemets.
The second main feature of the Coretech WMI and PowerShell Explorer is the PowerShell module. The intention with this module is to help you get started with Microsoft PowerShell and especially System Center 2012 Configuration Manager SP1 and PowerShell. The feature can be used to import custom PowerShell modules as well as built-in PowerShell modules. Once imported you can use the feature to easily see all the cmdlets in the module and navigate in the help topics. When working the built-in System Center 2012 SP1 Configuration Manager module; you will also be able to connect to www.cm12sdk.net and get access to hundreds of real life examples.
www.cm12sdk.net is a public library packaged with hundreds of simple and advanced PowerShell examples. The library is maintained by Kaido Järvements, a Microsoft Enterprise Client Management MVP working @Coretech as consultant and trainer.
How to import Configuration Manager 2012 PowerShell module
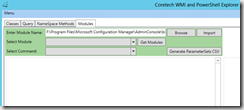
- Launch the Coretech WMI and PowerShell Explorer as Administrator.
- Select Modules tab.
- Click Browse and select the ConfigurationManager.psd1 file. The PowerShell module is part of the Configuration Manager administrator console installation and is stored in c:\Programs Files(x86)\Microsoft Configuration Manager\AdminConsole\bin\ConfigurationManager.psd1 or <ConfigMgr server install dir>\AdminConsole\bin\ConfigurationManager.psd1
- Back in the Coretech WMI and PowerShell Explorer click Import.
- During the Import process you might be presented with an error dialog complaining about PowerShell not being supported in 64-bit version. You can safely ignore that error by clicking OK.
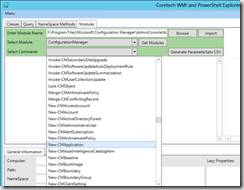
- Click Get Modules to load the imported modules.
- All loaded modules will be listed in the Select Module dropdown list. From the Select Module dropdown list click ConfigurationManager.
- From the Command dropdown list you’ll be presented with all the cmdlets in the ConfigurationManager module.
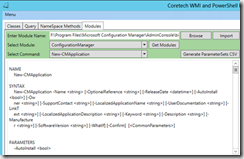
- Select the New-CMApplication cmdlet to view the help topics for the cmdlet.
- Now you should see the selected command help topics.
- In the right hand-side select Download Code example from CM12 SDK. You’ll now see one or more code examples that can be used in Configuration Manager 2012.
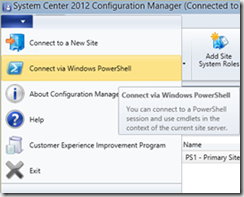
- Copy the example text and launch PowerShell from the Configuration Manager Administrator console.
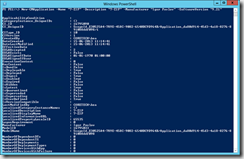
- In PowerShell type (or paste) the code example from CM12 SDK to create the application.
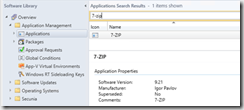
- The application is now created in Configuration Manager.
Happy PowerShelling






[…] A few weeks ago we released a new tool – WMI and PowerShell Explorer. You can use this tool to browse different namespaces, classes, methods etc and this tool is also integrated with CM12SDK web site and this means that you can download Configuration Manager 2012 PowerShell module command-let examples. You can read more about this feature from here […]
hi, i imported the CM module and try changing the drive to CM Site, however the drive is not mounted to CMSite Provider (checked using get-psprovider command).
can i achieve this using powershell command. tried with new-psdrive but getting null reference exception
i know drive can be mounted by opening ps console from CM console, but i want to achieve this using powershell.
please reply.
[…] http://blog.coretech.dk/kea/coretech-wmi-powershell-explorer-part-ii/ […]