The new preview of System Center Orchestrator 2012 R2, comes with a new part called “System Management Automation”
Not much info has been released about what it is, or what it can be used for.
update: more information have been released by microsoft. Start here
It seems to me to be a new runbook engine, with a completely new type of runbooks. I can’t wait to get more info about what it is , and what it is for.
It has 3 parts which is installed seperately:
- Web Service
- Runbook Worker
- PowerShell Module
I will try to post some of my exploration of this new part of Orchestrator.
This will be a series of blog articles.
So far these have been planned:
SCO 2012 R2: System Management Automation Part 1 – Overview and Setup
SCO 2012 R2: System Management Automation Part 2 – The PowerShell Module
SCO 2012 R2: System Management Automation Part 3 – The Web Service
SCO 2012 R2: System Management Automation Part 4 – Using the Web Service in Visual Studio 2012
In this article i’ll show how to use the PowerShell Module.
The idea is to give you a chance to play around with it, and any kind of comments/feedback is very welcomed!
Installation
Each part of the System Management Automation have to be installed seperately.
They should be installed in the following order:
- Web Service
- Runbook Worker
- PowerShell Module
- Register Runbook Worker via PowerShell
In my lab i have installed everything (including the rest of SCO R2 and SQL) on the same server, which is ofcause not recommended in production.
- First Install the basic parts of orchestrator (manament server, runbook designer, web features and runbook server), and make sure everything is running.
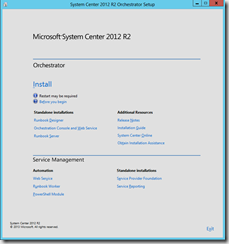
- Open the Setup Splash Screen
Web Service
Web service installation is in 2 parts. First Install Web service, then you need to enable the runbook worker on the web service via PowerShell.
Install
- In the Service Management Autmation section click Web Service
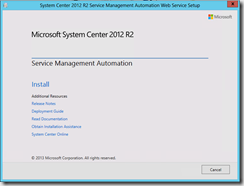
- Click Install
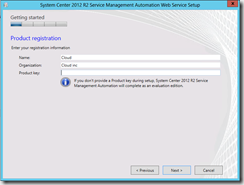
- Enter name and organization
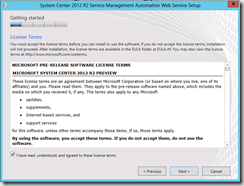
- Accept license agreement. Click Next
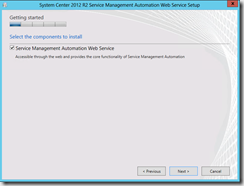
- Select Web service feature. Click Next
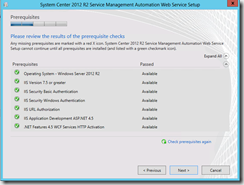
- Make sure all prerequisites is installed and enablen
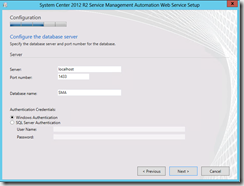
- Setup database information. In my lab the SQL is located at localhost on standard port 1433.
- Setup the administrators group or person. watch out for typos since there is no check!!
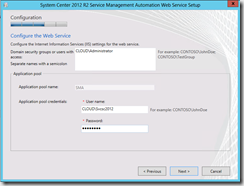
- Setup service account for the application pool, in my case i use the same service account as ORchestrator (which has domain admin in this lab). watch out for typos since there is no check!
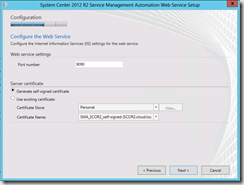
- Select port, i recommend to use the default port 9090
- Select certificate, i am using a self-signed certificate in this lab
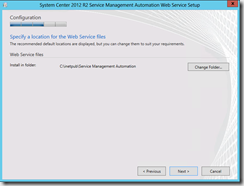
- Select Location. I recommend to keep it at default
- Enable updates and participate in the customer experience program (if you want to). click Next
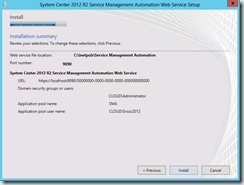
- At the summary, make sure that all info is correct. then click Install
Notice: the URL of the web service, including tenantID appears in this windows.
Runbook Worker
- In the splash screen, click Runbok worker.
- Enter name and organization (and key)
- Accept License. Click Next
- Enable the Runbook Worker Feature. Click Next
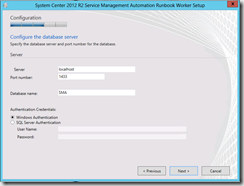
- Setup database information, this should be the database created by the Web Service installation.
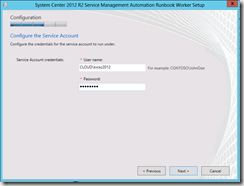
- Enter service acccount information
- Enable updates and participate in the customer experience program (if you want to). click Next
- At the summary, make sure that all info is correct. then click Install
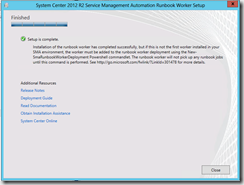
When the runbook worker has finished installing you will see this message:
It says to add the runbook worker to the runbook worker deployment using powershell command. This requires the powershell module to be installed first. See the guide below.
PowerShell Module
-
In the splash screen click PowerShell Module
-
The PowerShell module installs automatically.
See the blog post about the powershell module on this blog for more info!
Register runbook worker to the runbook worker deployment
- Open PowerShell
- Import Module
import-module Microsoft.SystemCenter.ServiceManagementAutomation
- Run the New-SMARunbookworkerdeployment cmdlet using parameters to explain computername and webservice info
New-SmaRunbookWorkerDeployment -ComputerName "scor2.cloud.local" -WebServiceEndpoint "https://scor2.cloud.local" -Port 9090
Now you are ready to go!
Next part will be published soon! and is about the PowerShell Module!
I have been browsing online more than 3 hours today, yet I never
found any interesting article like yours. It is pretty worth enough for me.
In my view, if all website owners and bloggers made
good content as you did, the net will be a lot more useful than ever before.