One of the new features in ConfigMgr SP1 is Cloud based distribution points. ConfigMgr SP1 clients can use the CDP as a fallback solution when the requested content is not available at an on-premise distribution point (the new term for the “old fashion DP”). It is not a replacement for Internet Based Client Management.
The benefit of having cloud distribution points are:
- You can easily create them
- You can easily add more resources if the scenarios where extra bandwidth is needed e.g. when upgrading to Office 2013 worldwide
- Nice fallback solution
- Clients will fallback to the Cloud DP if the requested packages are not found on the local DP or a remote DP.
Installing the Cloud DP – high level
When installing the Cloud DP you will have to go thru these steps.
- Prepare Configuration Manager, install and export the needed certificate
- Configure Windows Azure
- Install the CloudDP in SCCM 2012 and configure the Client Settings to allow the use of a Cloud DP
- Configure DNS so clients can connect with the Cloud DP
Prepare Configuration Manager
First you need to create a certificate that can be uploaded to Azure and also used when installing the Cloud DP role.
- I used the Windows Server 2012 certificate authority to create the certificate with these settings:
- from the Server Manager Dashboard, select Tools and Certification Authority
- Right click Certificate Templates and click Manage.
- Select the WEB Server Template and click Duplicate Template
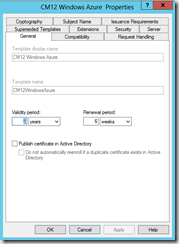
- General tab, Name: CM12 Windows Azure
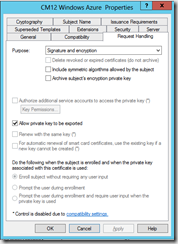
- Request handling tab, allow the private key to be exported True
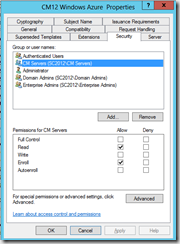
- Security tab: Added the Active Directory group CM Servers with Read and Enroll Certificate permissions
- Click OK and close Certificate Templates Console.
- Right click Certificate Template, select New Certificate Template to Issue
- Select the CM12 Windows Azure Certificate and click OK. The certificate is now created and must be enrolled on the server.
- Open an MMC and add the Certificates snap-in, select the Local Computer.
- Open the Personal store, right click Certificates and select All Tasks, Request New certificate.
- On the Before you begin page, click Next.
- On the Select Certificate Enrollment Policy page, select Active Directory Enrollment Policy and click Next.
- On the Request Certificates page, select the CM12 Windows Azure certificate and click the link more information is required to enroll this certificate…..

- In the Subject name, select Common name and type CloudDP.SC2012.Local and click Add (where SC2012.local is the name of your domain)
- In Alternative name, select DNS, type CloudDP.SC2012.local and click Add.
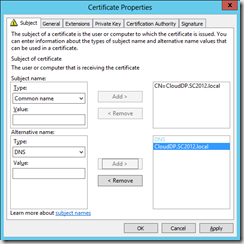
- Click OK and finish the enrollment.
- Still in the Certificates snap-in, right click the new CloudDP, select All Tasks, Export. You need to walkthru the export process twice, export a cer file and a pxf certificate.

- On the first page click Next.
- On the Export Private Key page, select No do not export the private key and click Next.
- On the Export file format, select CER and click Next.
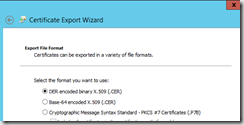
- Save the file as CloudDP.cer and finish the wizard.
- Export the certificate once more and this time select Yes, I want to export the private key.
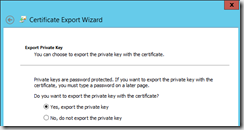
- Finish the export and save the certificate using the default settings.
Configuring Windows Azure
- In order to get started you first need to create a Windows Azure account.
- Log on to Windows Azure with you account
- Select Hosted Services, Storage Accounts & CDN
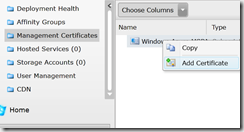
- Click on Management Certificates.
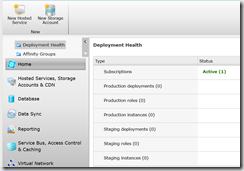
- Right click on the subscribtion and select Add Certificate and add the .Cer file.
- That was it for Azure – it takes a little while before the settings are applied.
Install the Cloud DP
- In Configuration Manager, select the Administration Workspace, Hierarchy Configuration, Cloud
- Click Create Cloud Distribution Point on the Ribbon.
- In Subscription ID, copy the subscription ID from you Azure account (you find it, by selecting Certificates).
- In Management Certificate, click Browse and select th PXF certificate.
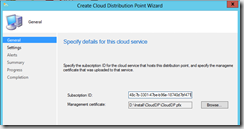
- Click Next – it might take a little while to verify the subscription ID.
- Select your “local region” and click Next
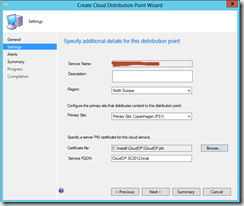
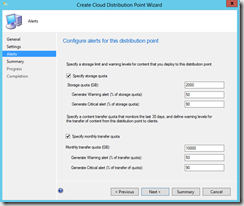
- Configure the exptected storage quota, monthly transfer rate and finish the wizard.
- In the background the CloudDP manager component will connect to Azure and start creating the service. This process can easily take several minutes (as in 30).
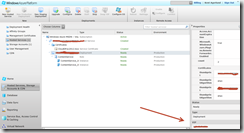
- When Azure is configured the Status in the ConfigMgr console will change to Ready.

- The Cloud DP is now ready and you can start distributing content to the service in the same way as you normally distribute content.
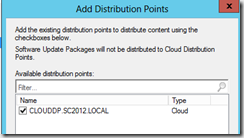
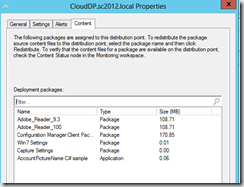
- You can monitor the content in Azure or open the Cloud DP properties and select the Content tab.
Configure DNS
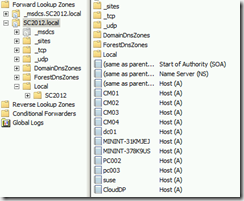
- In order for the clients to be able to download content, they must be able to resolve the CloudDP.SC2012.Local name to an IP address. You find the IP address in Windows Azure. Select Hosted Services, and navigate to the BLOB.
- Open DNS and create a new host record for CloudDP.SC2012.Local
Testing the deployment
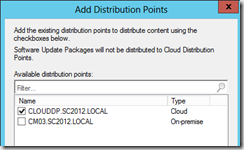
- Distribute the content as any other regular package and select the CloudDP type
- The package transfer manager will copy the content to the Cloud
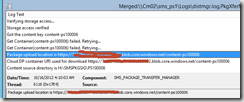
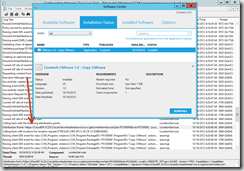
- The client receives the policy and initiates the download. Notice that the contentlocation is our new CloudDP
At the same time I was writting this blog post, my good friend and fellow MVP James Bannan posted a similar post - make sure you also read that article.


[…] […]
Hi Kent,
Good one, well detailed !!!
Yes, I appreciate your sensibility to friendship, and I read your fiends article too
Thanks, Vasu
Really good article!! Well explained.
Thanks.
Hi Kent,
I have a question and i belive you can explain this.
If i have two Cloud DP according to my site location one is US and Other is in UK.
How client will come to know which cloud DP is near like in normal DP they have booundary group and all.
What is the mechanism behind client detecting nearest cloud DP.
Regards
Bharat Chand
[…] http://blog.coretech.dk/kea/configmgr-cloud-distribution-points/ […]
It’s very straightforward to find out any matter on net as compared to books, as I found this post at this site.
Hi Kent
I have a question with regards to the cloud distribution point and when to use it. I have a customer with around 500 reps who are on the road constantly. The never come into the office but connect using VPN connections to use company LOB applications. I am not looking to distribute applications to them but would like to distribute Microsoft Security patches to them. Would you suggest using a cloud DP to deploy the distribution points to them or configure the microsoft’s windowsupdate.com as a fall back for download and install the patches.
I am just unclear on if the clients will just install all the patches available from windowsupdate.com or only the ones i specified in my deployment package. Also if i do not go with the Cloud DP would i need to create a ICMB server for them to receive the policies i configured for the Windows update package i created?
Any help would be greatly appriciated.
Kind regards
mark
Hey Kent….Nice Blog.
If we deploy cloud DP for one of the branch sites haaving 100 clients, so that means all clients will be connecting over WAN to cloud DP. So It is as good as all clients connecting to Microsoft update and using same level of b/w Is my understanding is wrong?
that’s correct
Hi Kent,
Is there a way to prioritize the cloud DP for remote clients? Downloading when connected via DirectAccess or VPN is taking too long (hours in some cases). I’d like those remote clients to use the cloud DP first.
The same goes for updates. I’d like remote clients to get them from Microsoft when not on on-site. I don’t see a way to configure connections as slow or fast in SCCM 2012
Thanks,
Russell
I ran through a ticket with MS Premier Support – the conclusion was that DirectAccess clients cannot use Cloud distribution points (and I assume Cloud Proxy Points too), essentially because the products were ‘not designed to work together’.
The issue is that when attempting to access a Cloud DP, the client needs to resolve the CNAME via the corporate DNS, which due to the NRPT is queried from the UAG/DA server. I should point out our internal domain is not externally published.
This may give the correct response of the .cloudapp.net name, but the client then attempts to reach that resource via the DA tunnel – and not via it’s local internet connection.
This failed anyway, maybe as we don’t have routing onward to the internet set up via our UAG/DA but it makes using a Cloud DP pointless as the traffic is already travelling through the DA tunnel back to the corporate network – at which point it may as well use a internal DP.
We are constrained on the capacity of our UAG/DA, both in terms of server resources and the internet bandwidth it has, to the point that we cannot roll out software to clients on DA. To be able to use a Cloud DP for these clients and still have them use DA would be ideal, and I find it hard to believe this wasn’t considered a use case when MS designed this.
Any suggestions on how to get around this would be welcome!
Russell – from the investigation carried out with MS, I think that to ensure that remote clients (perhaps it will work via the standard VPN) will only look to the Cloud DP, don’t configure a boundary for the IP range or AD site for the remote connected clients. The Cloud DP is referenced internally as a fallback content location, so you have to essentially force them to fallback by giving them no other content location.
Or, create duplicate packages for the same applications, and only distribute them to the Cloud DP, and only deploy them to the remote clients?
With regard to updates, just don’t distribute the software update packages to the DP that is assigned to the boundary catching the remote clients, this will trigger them to download from MS Update instead. (And glad to say this /does/ work with DA clients!)