Question if often get when visiting customers;”Is there really a need for managing our 3rd. party applications when we already patch Adobe Reader and JAVA”? The short answer is Yes, and the longer answer is please look at the numbers.
The absolute number of vulnerabilities detected in 2013 was 13,073, discovered in 2,289 products from 539 vendors. The number shows a 45% increase in vulnerabilities in the five year trend, and a 32% increase from 2012 to 2013. Knowing these numbers I get the feeling that only patching Adobe Reader and JAVA is not enough to keep my environment secure. So what do we need in order to increase the overall compliance in our environment? Most important in my opinion is trustworthy Compliance data, without those it’s almost like fighting in the dark – we think we know what to do, where and when. But in reality we do not know if our effort brings us any steps closer to the overall goal – 100% Compliance.
This blog post is part 1 where I will describe how you can configure a complete 3rd party pacth management solution with System Center 2012 Configuration Manager and Secunia CSI. First part will focus on why you need a 3rd party patch solution and also guide you thru the installation and basic configuration. Part 2 will focus on tracking compliance and deploying custom updates.
Components in a real 3rd party software update solution
Vulnerability information: Are you able to get a quick overview of what’s missing in your environment and where you should start to increase security the most with the least amount of effort?
Vulnerability Scan: Are you able to scan for more than just Microsoft Updates?
Patch Creation: Knowing what you have to deploy, are you able to create the packages in an easy and customizable way?
Patch deployment: Are you able to deploy that patches with an existing process or do you need to invent new processes?
System Center Updates Publisher aka SCUP is a free tool from Microsoft that allows you to author and publish your custom updates. The tool will take you part of the way, but it’s not really a true software update solution as it falls short in at least two of the 4 elements making up a complete patch management solution.
| SCUP | Secunia | |
| Vulnerability information | No | Yes |
| Vulnerability Scan | No | Yes |
| Patch Creation | Yes (have to create packages manually) | Yes |
| Patch deployment | Yes | Yes |
| Supported Platforms | Microsoft operating system | Microsoft operating system MAC OS X Linux Android |
Secunia CSI Components and installation
Installing Secunia CSI is a three step process.
- Install and configure the server side components
- Configure the required certificate and group policy components
- Perform a scan on one or more clients in the infrastructure
Install and configure the server side components
The server side components consist of 3 different components all installed separately. Notice that it’s not a requirement to install all three component. You are not required to install any of the updates on the Configuration Manager primary site server.
- CSI web console with browser plugin. This is the main CSI interface and can be downloaded once your are logged into the CSI web portal.
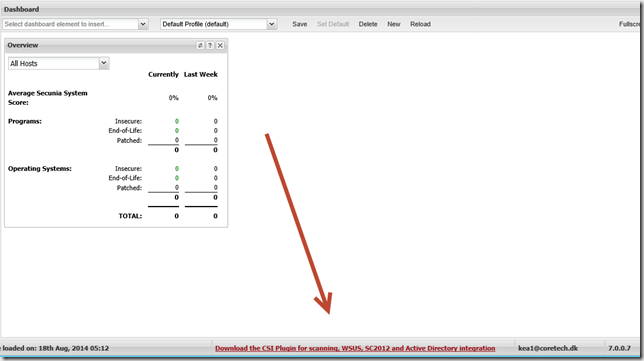
- Deamon service for Active Directory integration. This is required to establish connection to Active Directory and pull OU information.
- System Center 2012 Configuration Manager plugin. This is only required if you want to publish updates from within the ConfigMgr administrator console.
CSI web console requirements
There are a couple of requirements that must be in order before starting the installation.
- Microsoft .NET Framework 4.5 – http://www.microsoft.com/en-us/download/details.aspx?id=30653
- Microsoft Visual C++ 2012 Redistributable – http://www.microsoft.com/en-us/download/details.aspx?id=30679
- Internet Explorer settings:
First-Party cookie settings configured to at least to Prompt (in Internet Explorer)
Allow session cookies - Sites white listed in Internet explorer and Firewall/Proxy:
https://*.secunia.com
crl.verisign.net
crl.thawte.com
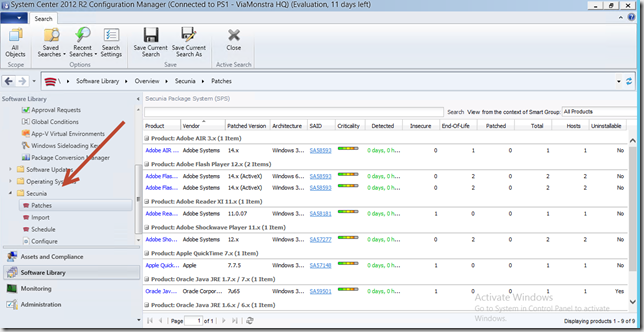
Installing the ConfigMgr plugin can be done on any ConfigMgr administrator console where you want the Secunia components to be visible. You do not have to install the plugin on the primary site server or CAS. Installing the plugin is as simple as running SC2012_CSI7PluginSetupx64.exe. Below is an example of the Secunia plugin installed on a local ConfigMgr administrator console.
Configure the required certificate and group policy components
Updates not coming from Microsoft Updates must be signed with a certificate. The requirement is the exact same for Secunia as well as for standalone SCUP installation. If you already have a certificate in place there is no reason for creating a new certificate. The certificate can be self-signed (created by Secunia CSI or SCUP) or it can be a real PKI certificate. If you are running WSUS on a Windows Server 2012 R2, please read this first as self-signed certificates has been deprecated in that version.
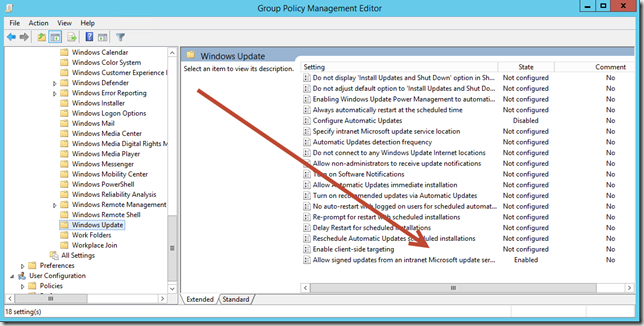
Besides having a certificate the local computer policy must also trust updates coming from an Intranet source. This is configured by changing your WSUS domain group policy as illustrated below.
Configure WSUS support and a self signed certificate
- Login to CSI 7 – https://csi7.secunia.com
- Select Patching, expand Configuration and select WSUS/SCCM.
- Click Configure Upstream Server to connect to the WSUS.
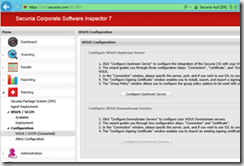
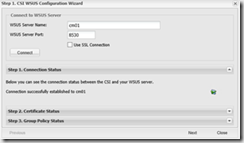
- Fill in the details on your WSUS/SUP server and click Next. In my example the Software Update Point is installed on CM01 using port 8530.
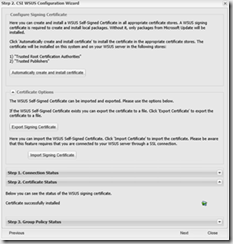
- On the Configuring Signing Certificate page, click Automatically create and install certificate to create the certificate in the WSUS certificate store.
- Close the wizard
The certificate is by default created in the WSUS certificate store. The certificate must be copied to the Trusted Publisher and Trusted Root stores on all client computers. You can do that in any way you like, create group policy or create a package in ConfigMgr using certutil.exe.
Perform a scan on one or more clients in the infrastructure
Last part is to scan the clients and collect data. In order to do that you have 4 options:
- Install the Secunia CSI agent locally
- Perform a network scan
- Configure ConfigMgr Software Inventory to collect *.exe, *.dll and *.ocx files
- Download the CSI agent, add it to a ConfigMgr package and perform the scan without installing the agent.
All options comes with various requirements, in my example I’m using option 4 and make use of the ConfigMgr infrastructure.
- Login to CSI 7 – https://csi7.secunia.com
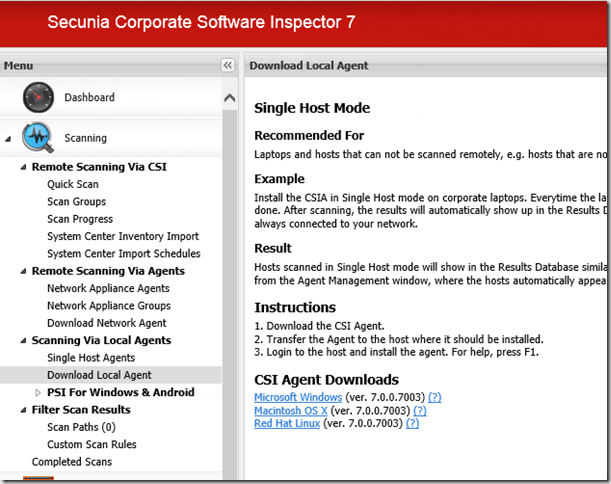
- Select Scanning, expand Scanning Via Local Agents and select Download Local Agent. Click on the download link for the Microsoft Windows client and store csia.exe in your ConfigMgr software source.
- Open the ConfigMgr administrator console and create a new package with these properties
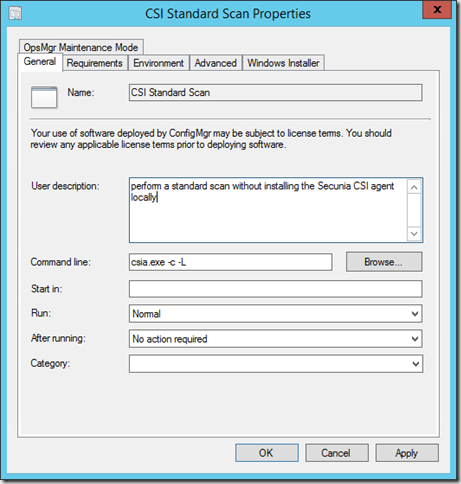
- Distribute the package and create a recurrent deployment like this (in this example the scan runs every 3rd day).
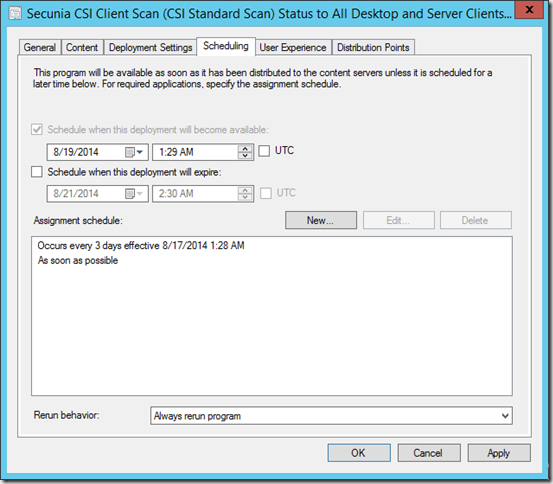
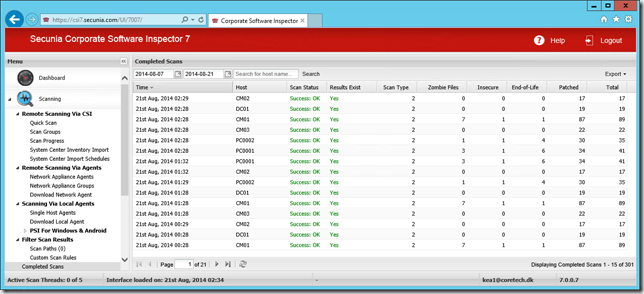
Within an hour from the first scan you will start seeing compliance data in the CSI portal and in the ConfigMgr console where the CSI plugin is installed. You can
Part II will take a deeper dive into monitoring compliance, creating e-mail notifications, customs reports and deploy updates.

