A few years ago I wrote a blog posts on Microsoft SCUP and Secunia CSI 5.0. Back then my conclusion was that Secunia had a superb security database but required a custom agent and didn’t have an easy Configuration Manager Console integration. With the latest release of Secunia CSI those “obstacles” are removed and the solution looks very promising. In this, my first test drive of the product, I will see how quickly I can install the solution and start patching my environment.
The installation
CSI requires that you first install the CSI administrator console and then the CSI SCCM plug-in. The installation process takes less than 1 minute and is straight out-of-the-box. You can download a free evaluation copy from http://secunia.com/vulnerability_scanning/corporate/sccm_plugin/
Configure WSUS and Configuration Manager Integration
In order to configure the integration you need to do a few things first, like configuring WSUS, create or configure the self-signed certificate and deploy the certificate. CSI allows you to configure all of these settings with a simple wizard. The wizard is perfect for lab environments and small business but also allow mid-sized and enterprise organizations the flexibility to configure their own settings.
- Launch the Secunia CSI console as Administrator (if not the wizard will present you with an error when creating the GPO), select Patching, Configuration, WSUS/SCCM (Disconnected).
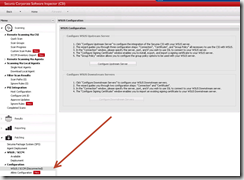
- Click Configure Upstream Server
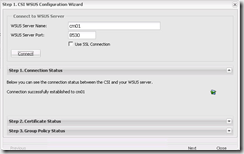
- Fill in the WSUS server name along with the Port and click Connect. Once successfully connected, click Next.
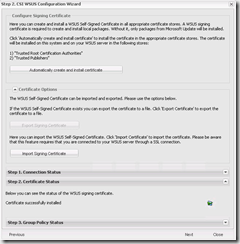
- On the Configure Signing Certificate click Automatically Create and Install certificate. This will create a WSUS self-signing certificate on the server which you need to deploy to all clients.
- On the final step select Use SCCM to distribute packages and click Create Group Policy. This will create a WSUS-CSI GPO with the required configurations. Even if you like to create your own GPO’s, it’s still nice to have them created correctly for you.
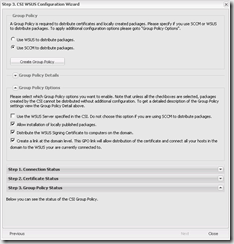
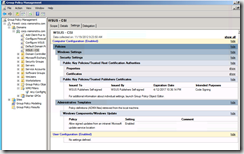
- The Domain joined WSUS-CSI GPO configures the self-signed certificate and configures clients to trust updates that are signed with the certificate.
Scanning the clients
We need to deliver compliance information to Secunia before updates will be made available. The compliance data can be delivered using one of the four different scanning solutions.
- Install a Secunia scan agent on the host. The agent is a very lightweight agent and has a minimum impact on the client.
- Perform an “Over the air network scan”.
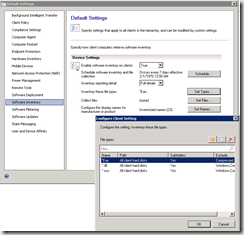
- Configure the Software Inventory agent setting in ConfigMgr. to scan for Exe, .DLL and OCX files.
- Create a package in ConfigMgr with the scanning agent and run the package on a schedule.
In this test drive I will use the software inventory information from my ConfigMgr. clients.
- To configure the Software Inventory settings open the Configuration Manager console, select the Administration workspace, select Client Settings and either configure a new custom device setting or modify an existing setting.
- Next open the Secunia management console and navigate to, Scanning, SCCM Inventory Import and click Configure SCCM.
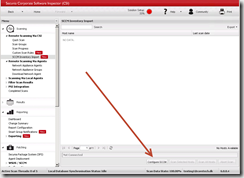
- Fill in the Site server name and click Save. Secunia will connect to ConfigMgr. and import ConfigMgr. client data. For Enterprise companies this process can easily take a little while. If the process seems to be too time consuming; remember that also have other scanning options like installing the Secunia client on selected clients or running the scan using a ConfigMgr. package.

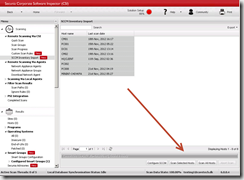
- Select the number of hosts and initiate a scan by clicking Scan Selected Hosts. The scan process will scan the imported data for compliance against the Secunia database.
Deploying patches
Approving and deploying patches can be performed from within the CSI console or in the ConfigMgr. console using the CSI plug-in. The plug-in is creating a Secunia folder in Software Library from where you can configure WSUS settings and see a list of all insecure applications in the environment. In this example I only had a few Adobe applications installed but the scan process will find many more apps like Java, Google Chrome, Firefox and the list just goes on.
To deploy a patch do the following
- Right click the insecure application and select Create Update Package

- Click Next or import an existing SPS package.
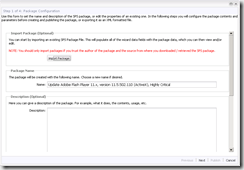
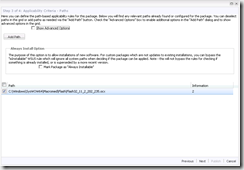
- Click Next (notice that you can make the update Always installable, this will allow clients who do not have the application to install it).
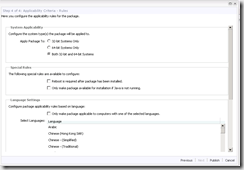
- On the last page; click Publish.
- Once the package is created and published click OK

- After the next WSUS synchronization the updates will appear in Software Updates all ready for deployment
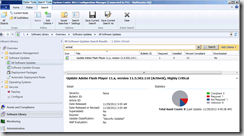
You might wonder why you have to go thru a 4 page wizard to deploy an update. To me, it’s all about control and having the flexibility to do almost whatever I want. This scenario is fairly simple, but there could be other scenarios where you might want to uninstall several older versions of the application before start to deploy the new version.
Happy patching


Thanks for this. It would be great to find an article comparing this product and a couple of the competitors. Have you had any dealings with the others? Any features you like over another?
Secunia CSI http://secunia.com/vulnerability_scanning/corporate/sccm_plugin/
Solarwinds Patch Manager(EminentWare) http://www.solarwinds.com/patch-manager.aspx
vCentrer Protect Catalog – http://www.vmware.com/products/datacenter-virtualization/vcenter-protect-update-catalog/overview.html
I wanted to thank you for this great read!! I have you bookmarked to check out new stuff you post.