
First of all this is not a blog post on how you create an provisioning package or how that works. However I will link a few other post from Microsoft to get you started if that is something you are looking for. So jump to the end of this post for a select few great posts on the topic. If you are using Autopilot, then you are using Autopilot, good for you! 🙂 There may be situations where you want to combine provisioning packages and Autopilot. I will explain this further in an upcoming blogpost about Autopilot.
Now, in this post I just quickly want to show you how I automate OSD with the Windows 10 ISO, Anuattended.xml and a provisioning package in order to simply deploy Windows 10 and provision it with settings and also maybe join AAD and Intune, without any user input other than selecting the USB-memory stick during startup. Drivers you say? Well – that comes from a magic place called WU (Windows Update)! You can slipstream drives into install.wim if you have issues installing drives or finding disks during the initial phase of Windows installation.
So buckle up, these are the ingredients.
- Windows 10 ISO (preferably 1709)
- Provisioning Package with your required settings
- Autounattended.xml (relax, you will get it here in this post) for Automation
- USB Memory stick 8GB or larger, I recommend a USB 3.0 or faster. The size of the stick will also depend whether or not you slipstream something into install.wim (the default Win Image) however, the purpose of this blog is to show you how far you can actually come with just the ISO and some other free tools from Microsoft.
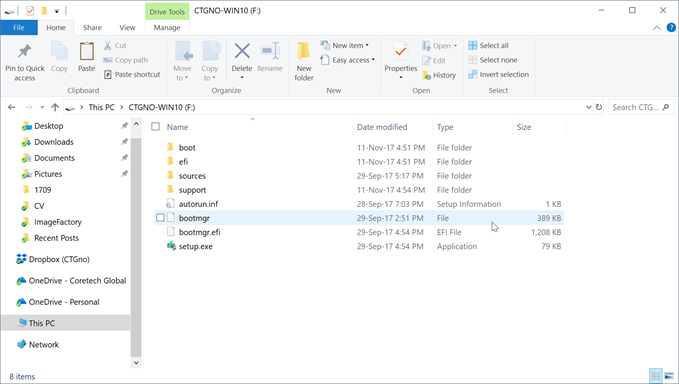
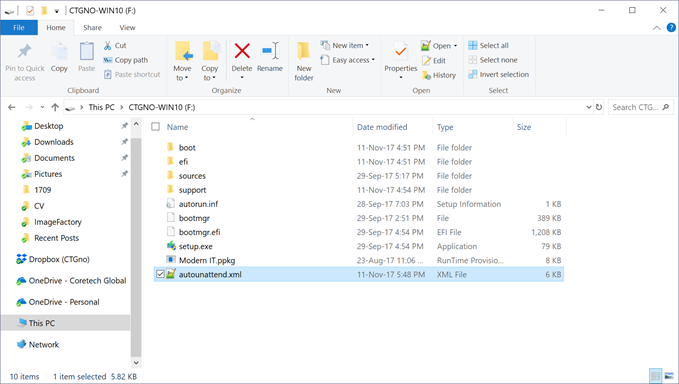
The first thing you want to do is to place all of the content of the Win10 iso on to a FAT32 formatted USB drive. Now, you can format the drive with NTFS to support larger files if you customize install.wim. But that is for a later post. Intent for this post is to get you going as fast as possible wiht as few customizations as possible.
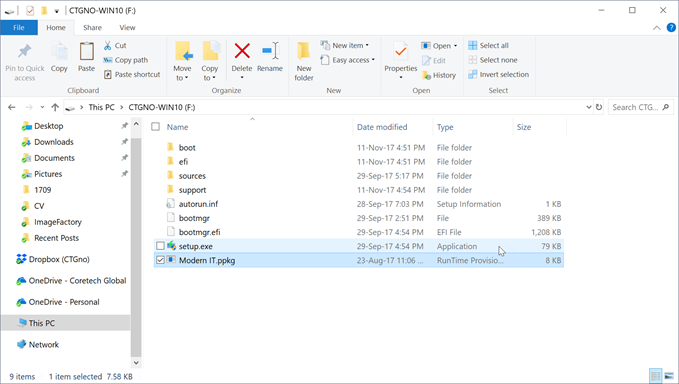
Next, copy your provisioning package to the root of the drive. When the installation is done and you are presented with the OOBE (Out of Box Experience) the first choice is language. Now when you place an provisioning package at the root of an drive an insert the drive at this point then it will automatically install the package. If you have encrypted the package with an password, then you are prompted to enter this before you can continue.
The last thing you need or want to use is an Autounattend.xml file. The can be created manually or with ICD (Image and Configuration Designer) which is an part of Windows ADK (Automated Deployment Toolkit). Now in this post I have provided one example that works great in the “modern world” where I have automated the following:
- Language
- Disk Configuration
- SKU Choice
- License agrement
These steps are the Bare minimum if you want to automate Windows installation properly:
-
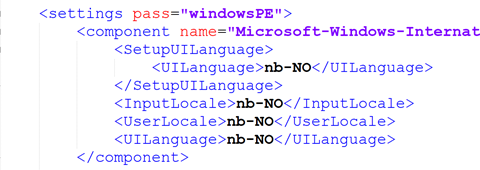
Language
This section controls your Language preferences.
-
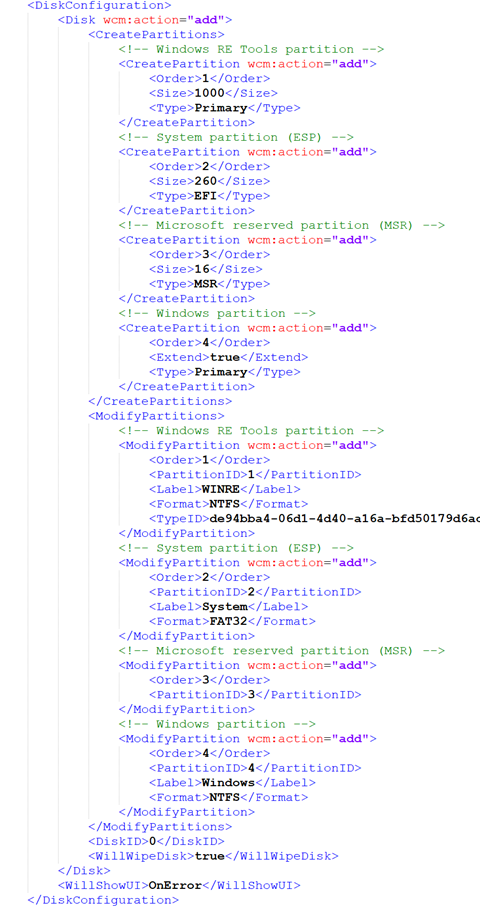
Disk Configuration
This section controls how the outcome of the disk layout. This step is really important to get right so that you are able to, in an easy way, enforce BitLocker policies to the client without to much hassle for the end user. If you get this one right, Always-on-Connected devices, like an Surface Pro 4, will automatically encrypt it’s drive with BitLocker when it is Azure AD joined and other devices will get an simple and effective wizard to use.
-
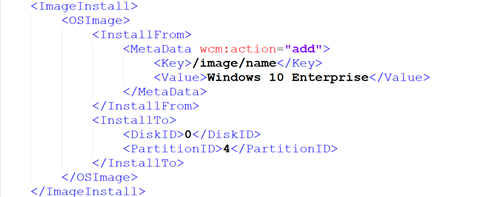
SKU Choice
In Windows 1709, when you download the media, you will see that it comes with all SKUs in one ISO. That means that when you fire the ISO up and start the installation you will be prompted to install Windows 10 Education, Enterprise or Pro and a few other flavors depending on which region in the world you belong to. You also decide which disk and partition you install to and based on the configuration above, I will install to disk 0 and partition 4. In the example below Windows 10 Enterprise will be installed. If you want to change that to Education, then you simply change the value to Windows 10 Education.
-
License agrement
In this section you accept and agrees to the Microsoft terms and conditions for installing the OS.

Download the above example here: [download id=”12180″]
When finished copy the Autounattend.xml file to the root of the USB drive.
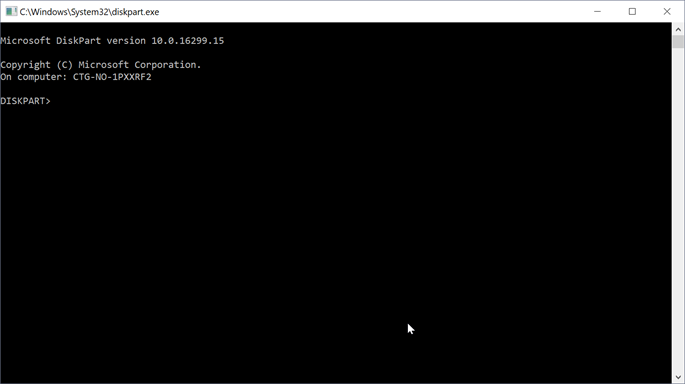
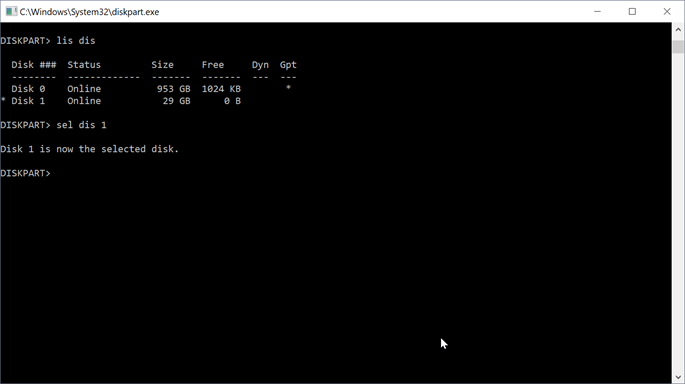
Last we need to make the partition active so that your PC actually will boot from the USB Drive. This is done using diskpart which is integrated with your Windows OS. Just open up start menu and type diskpart, it will require elevated admistrative rights.
Type: List disk or lis dis to list all the disk available:
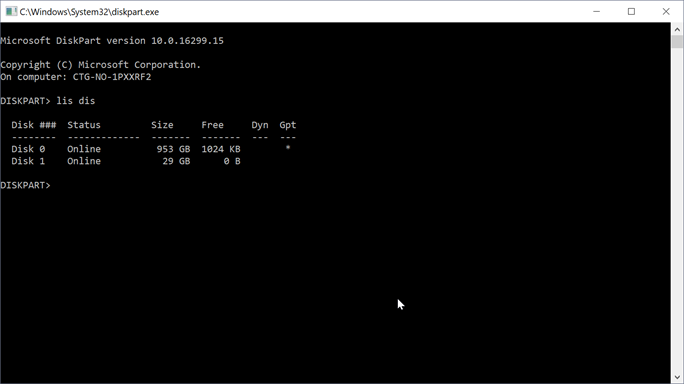
Identify your USB Drive and type select disk / sel dis (drive number) and press enter:
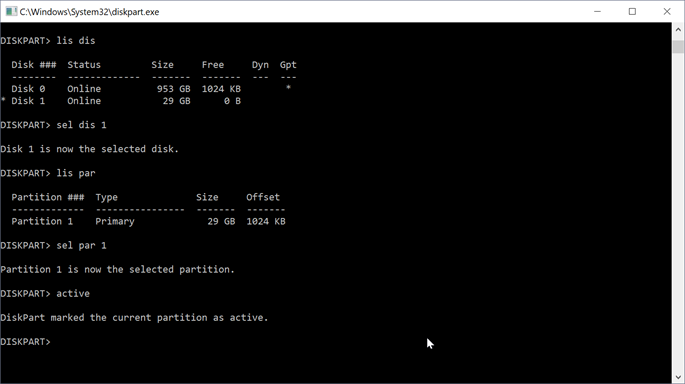
Identify the partition by typing list partition / lis par:

Select the approriate partition and activate it by first typing select partition / sel (Partition ID) and second typing active .
Your drive is now ready to serve it’s purpose. Eject the drive using the remove drive safely feature in Windows down in SysTray.
As promised here are a few links to some great resources arround the topic.
- Download and install Windows ADK:
https://docs.microsoft.com/en-us/windows-hardware/get-started/adk-install - Install Windows Configuration Designer:
https://docs.microsoft.com/en-us/windows/configuration/provisioning-packages/provisioning-install-icd - Create a provisioning package for Windows 10:
https://docs.microsoft.com/en-us/windows/configuration/provisioning-packages/provisioning-create-package - Provisioning packages for Windows 10:
https://docs.microsoft.com/en-us/windows/configuration/provisioning-packages/provisioning-packages - How provisioning works in Windows 10:
https://docs.microsoft.com/en-us/windows/configuration/provisioning-packages/provisioning-how-it-works - What’s new for IT pros in Windows 10, version 1709: https://blogs.technet.microsoft.com/windowsitpro/2017/10/17/whats-new-for-it-pros-in-windows-10-version-1709/
- What’s new in Windows 10, version 1709 IT Pro content:
https://docs.microsoft.com/en-us/windows/whats-new/whats-new-windows-10-version-1709

